Common LiftMaster Error Codes &
How To Fix Them
-
June 24, 2025
-
Gracen Zucha
Ever come home, hit your LiftMaster opener button, and watch the whole system flash? Those blinking lights are trying to talk to you.
LiftMaster uses diagnostic codes to let you know there’s a problem.
Understanding these codes helps you fix issues faster, avoid bigger problems later, and keep your garage door opener operating properly.
At Welborn Garage, we’ve helped thousands of Dallas‑Fort Worth homeowners decode these flashing signals. Let’s break them down.
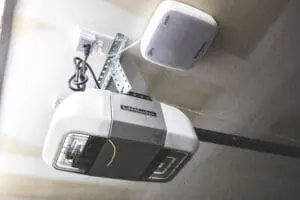
How LiftMaster Shows Error Codes
LiftMaster openers (post-2011 models) use a combination of:
- LED light near the Learn button—or
- Up / Down arrows on the motor housing—
…that blink in sequences like “1 up, 4 down.”
Each combo points to a specific issue
Error Code 1‑1 (One Up, One Down): Sensor Issue (H2)
What it means: Photo‑eyes (safety sensors) are misaligned, blocked, disconnected, or have broken wires .
Symptoms: Door starts closing, then reverses or stops. Lights click 10 times, or arrows show 1‑1 .
DIY fix:
- Clean the lenses gently.
- Make sure sensors line up—green light steady.
- Check wiring—reseat or replace if damaged.
- After fixing, fully unplug/open then plug back in to reset.
Error Code 1‑2: Sensor Wiring Issue
What it means: Wires are reversed or shorted between sensors
Symptoms: Same as 1‑1, but lights blink 1‑2.
DIY fix:
- Confirm sensor wires match opener terminals.
- Swap if reversed.
- Tighten connection points and test again.
Error Code 1‑3: Wall Control Wire Issue
What it means: Wall button wiring is shorted or broken .
Symptoms: Wall button doesn’t open door and error shows 1‑3.
DIY fix:
- Disconnect and reattach wall control wires.
- Replace damaged wires.
- Replace button if still faulty.
Error Code 1‑4: Sensor Misalignment or Obstruction
What it means: A sensor issue showed up briefly during a close cycle
Symptoms: Door stops and reverses mid-cycle; arrows flash 1‑4.
DIY fix:
- Clean and realign sensors again.
- Remove stray objects.
- Power-cycle opener—unplug, wait 30 sec, plug back in—test.
Error Code 1‑5: Travel Module Communication Error
What it means: The opener can’t talk to the travel module (limits system)
Symptoms: Door stops early or won’t close. Light arrows flash 1‑5.
DIY fix:
- Check wire harness between module and board.
- Unplug/plug connectors to reset.
- If that fails, module may need replacement.
Error Code 1‑6: RPM Detected After Stop
What it means: Door moved after opener motor shut off at top position .
Symptoms: Door drifts down slightly after fully opening.
DIY fix:
- Test door balance by hand using emergency cord.
- If it drifts, reset manual release and test.
- If it won’t latch or drifts again, call us.
Error Codes 2‑1 to 2‑5: Logic Board Failure
What it means: Internal opener circuit board issues
Symptoms: Opener doesn’t do expected actions; lights flash Up‑2/Down‑1 through 2‑5.
DIY fix:
- Unplug opener + disconnect backup battery.
- Re‑plug power.
- If code returns, the logic board needs replacement.
Error Codes 4‑1 to 4‑4: Excessive Force Detected
What it means: The opener sensed too much resistance—door might be binding or spring is broken
Symptoms: Door stops/grounds mid‑travel, arrows flash codes like 4‑2.
DIY fix:
- Disengage opener; move door manually. Does it catch?
- Check tracks for dents or misalignment—don’t hammer them back yourself; seek pro help.
- Inspect springs—they carry 90% of weight.
- If balanced, reset travel limits. If code persists, motor’s force sensor might need replacing.
Error Code 4‑5: Travel Module Communication Error
Same as above but flagged during a close cycle
Fix: Reconnect wiring, reset limits, replace module if needed.
Error Code 4‑6: Safety Sensor Interrupted Mid‑Close
What it means: Gate tried closing during sensor issue and stopped .
Symptoms: Light arrows flash, door stops mid-cycle.
DIY fix: Check sensors again—clean, align, remove blockages.
Error Code 5‑5: RPM Sensor Issue or Mechanical Obstruction
What it means: RPM sensor didn’t get expected signal—door stuck or slow .
Symptoms: Door moves a few inches then stops. Indicators flash 5‑5.
DIY fix:
- Inspect rollers, tracks, and springs.
- Lubricate and tighten hardware.
- If it drags, call us for inspection.
Other Codes
- 3‑1: Auto stop detected—maybe travel limits.
- 3‑2: Force too high for open.
- Up to 9‑x: Sensor/keypad/receiver issues
Always Start With These Checks
- Unplug and reset power – often clears codes
- Clean & realign sensors – easy and fast
- Check wiring – pinch or damage common
- Try manual door operation – reveals balance and binding
Adjust limits/force – keep screw turns small
When To Call Welborn Garage
DIY is great—but some fixes demand the pros:
- Broken springs (serious danger)
- Bent tracks or major hardware damage
- Faulty logic board or travel module replacement
- Persistent error codes after DIY steps
Repair vs Replace: When Errors Signal Time for a New Opener
If your opener triggers multiple codes regularly, it might be time for an upgrade. New models come with:
- Smart-phone control
- Belt-drive quietness
- Battery backup for power outages
- Enhanced diagnostics
A modern opener costs more upfront—but saves in repairs and adds home value.
Related Blogs